Showing posts with label sweet. Show all posts

Monday, January 30, 2012

Strawberry Champagne Cupcakes Recipe


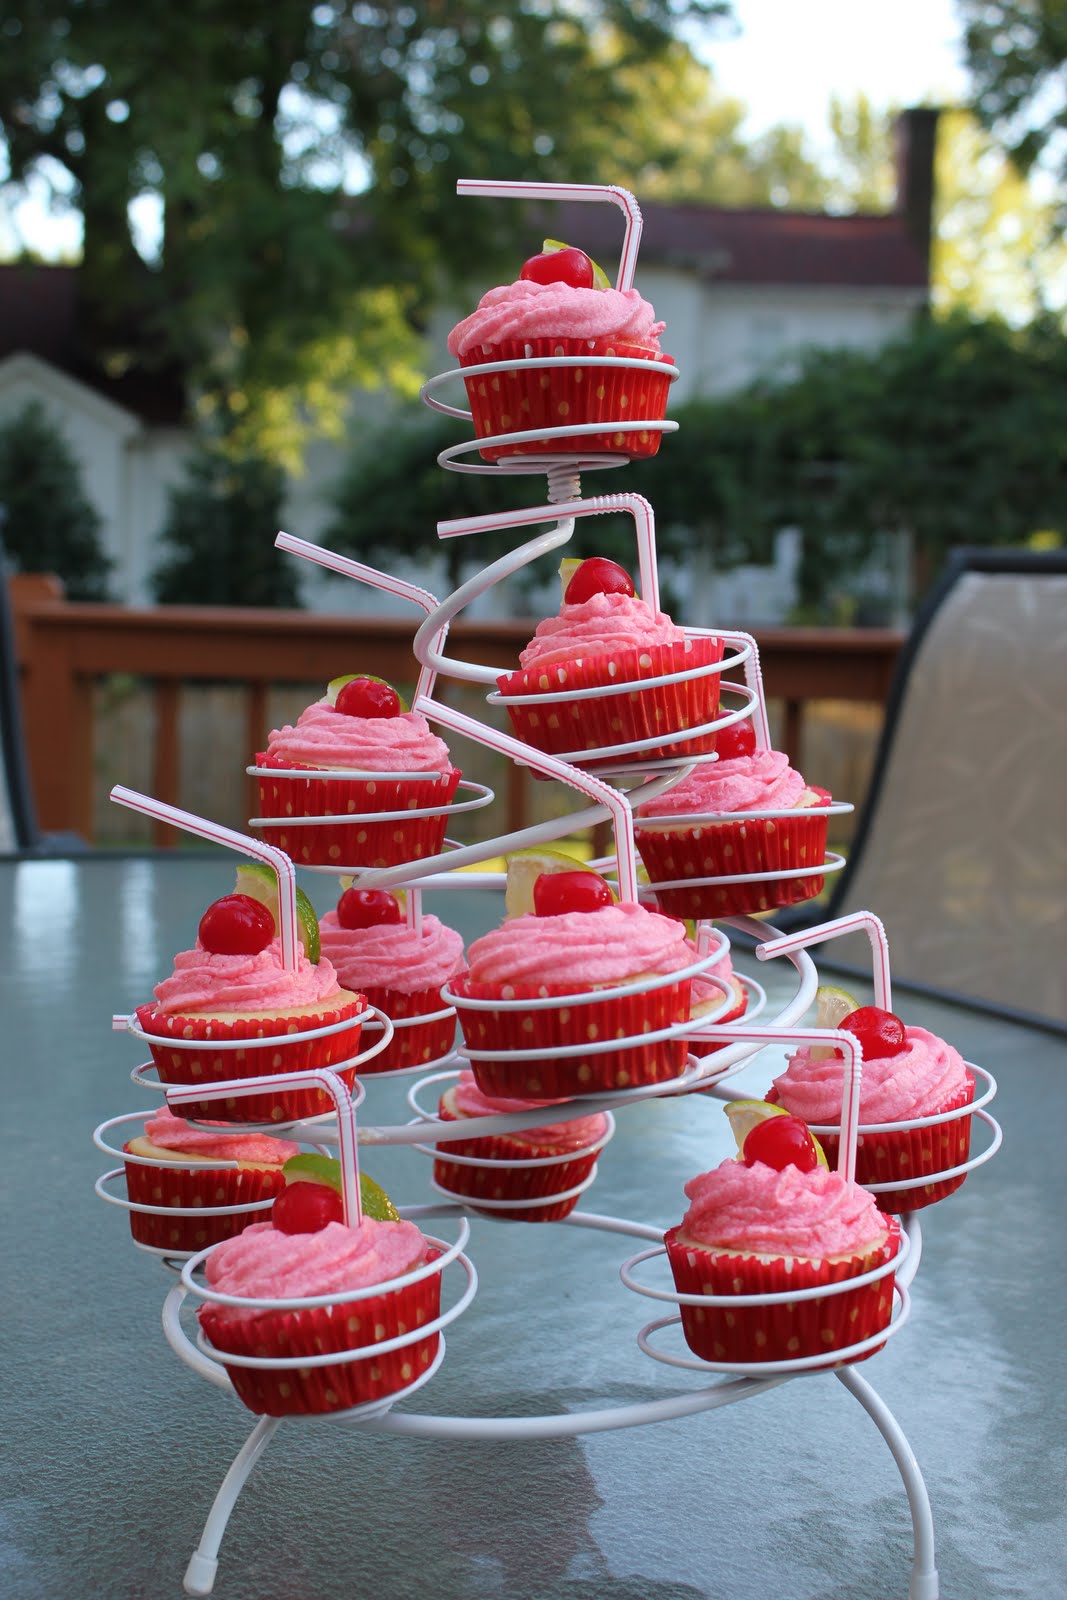
After taking your very first bite of these cupcakes you will be hit with the sensational flavors of fresh strawberries, decadent marshmallow all topped off with a light and creamy champagne whipped cream.  What really surprised me was just how moist the cupcakes were!   Tell someone that you love them this Valentine's Day with this romantic dessert.  I like to top these with sprinkles to resemble champagne bubbles.  

Strawberry Cupcakes
2 1/2 cups of all purpose flour
1 cup of sugar
1 teaspoon of baking powder
1/4 teaspoon of salt
1 cup of strawberries, pureed
3 tablespoons of strawberry preserves
4 eggs
1 cup of strawberry champagne
1 teaspoon of vanilla extract
1/2 butter, melted
1/2 cup vegetable oil

Filling
1 cup of Marshmallow Fluff

Whipped Cream and Champagne Frosting
4 cups of heavy whipping cream
1/2 cup of strawberry champagne
1 cup of powdered sugar
2-3 drops of red food coloring

1.  Preheat the oven to 350 degrees.  In a large bowl add the flour, sugar, baking powder and salt.  Make a well in the middle.  

2.  In a medium bowl combine the strawberries, strawberry preserves, eggs, champagne, vanilla, oil and butter.  Using a mixer, beat on medium speed for about 2 minutes or until well combined.  Slowly start to add the wet ingredients to the well made in the middle of the dry ingredients.  Mix until combined.

3.  Line cupcake pans with colorful liners.  Pour batter 3/4  of the way full.  Bake for 20-23 minutes.  Allow the cupcakes to fully cool.

4.  Scoop the marshmallow fluff into a piping bag.  Using a piping bag push the tip into the center of the cupcake.  Fill with marshmallow frosting.

5.  In a large bowl, cream the whipped cream, champagne, powdered sugar until soft peaks are formed.  Now add in the food coloring and continue to whip until stiff peaks are formed.  Place the frosting in a piping bag and then frost the top of the cupcakes.  

Thursday, December 22, 2011

Peanut Butter and Chocolate Covered Pretzels Recipe


Homemade goodies make for some of the best and most thoughtful holiday presents.  And when they are simple and affordable to make I love them even more. Bring the kids into the kitchen and have them help!  This recipe makes about 100 pretzels.  
1 jar of pretzel rods
16 oz of milk chocolate, melted
2/3 cup of peanut butter
Holiday covered sprinkles or chopped nuts
1.  Place wax paper on a sheet pan, so the chocolate won't stick.
2.  In a glass bowl, add the chocolate and peanut butter into the microwave for 30 seconds, remove and briefly stir with a rubber spoon.  Place it back into the microwave and continue to heat in increments of 30 seconds until all the chocolate mixture is melted.  Stir until it is completely smooth and incorporated. 
3.  Dip one end of the pretzel into the chocolate so there is only 1-2 inches (where you are holding it) uncovered.  Lightly shake excess chocolate back into the bowl.
4.  Dip into sprinkles or chopped nuts and then place on waxed sheet pan.   Place in the fridge for 5-10 to allow the chocolate to harden. 

Wednesday, December 21, 2011

White Chocolate Christmas Lollipops Recipe


This is a simple holiday treat that is a perfect way to show friends, neighbors and co-workers that you are thinking about them during the holiday season.  It's wonderful to give as gifts or even at your holiday party.  The colors are unbeatable and are fun, easy thing to do with the kids in the kitchen.  I love the flavors in this delectable lollipop, sweet creamy chocolate, tart cranberries and salty pistachios!  Yum!

16 oz of white chocolate, melted
1/2 cup of dried cranberries (I used Crasins that had been soaked in blueberry juice, but the regular kind will do) 
1/2 cup of pistachios, diced
Lollipop sticks


1.  Place wax paper on a sheet pan, so the chocolate won't stick.
2.  In a glass bowl, add the white chocolate and put in the microwave for 30 seconds, remove and briefly stir with a rubber spoon.  Place it back into the microwave and continue to heat in increments of 30 seconds until all the chocolate is melted.  Stir chocolate until it is completely smooth. 
3.  Grab a tablespoon and pour the melted chocolate onto the wax paper into circular rounds.  You can use the back of the spoon to help shape the lollipops.  Put the lollipop stick in the middle of each of the chocolates, and then give each stick a twist, so that the stick has been full covered with all the chocolate.
4.  Sprinkle the tops with the dried cranberries and pistachios.  Place in the fridge for 5-10 to allow the chocolate to harden.  

Thursday, December 8, 2011

Peppermint Bark Sugar Cookie Brownies Recipe


Calling all chocoholics, my Peppermint Bark Chocolate Bars are rich, gooey and a perfect treat for the holidays.  There never seems like there is enough time during this time of year, so you will be glad to know that these cookie bars use refrigerated cookie dough, but nobody will ever know!  So, if you haven't already, give into your sweet tooth this and head to the kitchen!  Beware, make sure to pour a tall glass of ice cold milk to accompany this perfect holiday treat!  Also, the recipe for the chocolate crumb crust is very versatile and can be used again and again.  Next time pour brownie mix on top or even use this as your base for an ice cream cake! 

Chocolate Crumb Crust
2 cups of finely crushed vanilla wafers
1/3 cup of unsweetened cocoa powder
2/3 cup of powdered sugar
6 tablespoons of butter, melted

1 1/4 cup of semi sweet chocolate chips
1 tube of Pillsbury refrigerated peppermint sugar cookie
1/3 cup of crushed peppermint candy canes

1.  Preheat your oven to 375 degrees.  Grease a 11x7 glassware pan.  In a medium sized bowl combine the vanilla wafers, cocoa powder, sugar and butter and stir until well combined.  Add the chocolate mixture to the bottom pan and then firmly press down until it forms the chocolate crust.

2.  Sprinkle the chocolate chip chips on top of the chocolate crumb crust.  Now carefully spread the peppermint sugar cookie dough on the top.  Allow this to bake for about 18 mintues and then carefully sprinkle the crushed peppermint candy canes and allow it bake for another 5-7 minutes. 

3.  Allow your dessert to fully cool and then cut into bars.  

Tuesday, October 25, 2011

Sweet and Smoky Pumpkin Seeds Recipe


Halloween is less than a week away and that means it's time to start carving pumpkins.  So bust out those cookie pans because it's time to roast some pumpkin seeds!  These seeds are my absolute favorite, they are sweet and smoky and ohhhhh so yummy.  Seriously I am addicted!  Oh, and learn from my mistakes and actually use the wax paper, if not have fun cleaning baked on brown sugar.  

3 Cups of Pumpkin Seeds, washed 
3 tablespoons of extra virgin olive oil
1/4 cup of brown sugar ( I used Splenda Brown Sugar)
2 teaspoons of chili powder
1 pinch of nutmeg
Wax paper

1.  Preheat the oven to 350 degrees.  Take a spoon and scrape out the pumpkin seeds into a bowl.  Separate the seeds from the stringy pumpkin innards. Rinse seeds in a colander.  Place pumpkin seeds back into a bowl. 

2.  Drizzle extra virgin olive oil over the seeds.  Add the above ingredients to the bowl and then toss until everything is evenly distributed. 

3.  Add wax paper to your cookie sheet and then spread the seeds out on the pan in an even layer.  Bake for about 45 minutes, stirring once every 15 minutes so the seeds do not stick.  

Wednesday, October 19, 2011

Balsamic Strawberry Preserves Recipe


I went to Whole Foods yesterday and I love their pecan-encrusted tilapia!  It tastes so simple and yummy and the price is very affordable too.  I served the fish with my super easy Balsamic Strawberry Jam Recipe.  I know what you must be thinking, strawberry preserves on fish?  Trust me it's so good!  It's sweet, but slightly acidic from the vinager, which enhances the delicate fish flavor.  It would also be wonderful if paired with chicken or pork chops!

1/4 cup of strawberry preserves
4 strawberries chopped up
1 tablespoons of balsamic vinegar

1.  In a small bowl combine the above ingredients.  Whisk until well combined.  Serve with chicken, fish or pork chops.

Tuesday, October 11, 2011

Mini Key Lime Cheesecakes Recipe


Key Lime Cheesecake is one of my all time favorite desserts and hits the spot really anytime!  Imagine deliciously tart and sweet and yummy all rolled out into one cute little cheesecake!  I usually make this recipe using a springform pan (so that is always an option just bake for about 50-60 minutes instead), but I thought they would be cute to bring to a BBQ individually sized. I actually made two batches of this recipe this weekend- one using sugar and the other using Splenda (same measurements).  So anyone who is diabetic, this will surely hit their sweet tooth! It makes a total of 12 tarts.

Crust
1 1/4 cup of graham cracker crumbs
1/4 cup sugar
1/4 cup butter, melted
1 dash of cinnamon 

Filling
8 oz cream cheese, softened
1/2 cup of sugar
2 1/2 tablespoons of flour
2 eggs
1/2 cup of key lime juice
1 teaspoon of vanilla
1 drop of green food coloring

Whipped Cream For The Topping


1.  Mix the graham cracker crumbs and sugar with the melted butter.  Grease a cupcake tin.  Scoop a little bit out of the graham cracker mixture and then press onto the bottom.  Bake at 375 degrees for 3 minutes.  Allow this to cool while preparing your filling. 

2.  Set your oven down to 325 degrees.  In a large mixing bowl, beat the cream cheese, sugar and flour until it is fully smooth.  Add your wet ingredients next including the eggs, juice, vanilla and food coloring (seriously only one drop guys 2 honestly puts it over the top.)  Stir until mixed (be careful not to over beat your batter). 

3.  Scoop mixture into the individually sized tins.  There will be enough to make 12.  Pop in your oven for 20 minutes and then allow the cheesecakes to cool.  Run a knife around the edges to allow it to loosen.  Allow the cheesecakes to cool for over an hour and then place in the fridge over night or for several hours.  Top with whip cream and enjoy!

Monday, September 12, 2011

Cherry Limeade Cupcakes Recipe


My aunt and little cousin's birthday happen to be on the same day.  We were already having a Justin Bieber themed party for the little one and I still wanted to do a little something special for my aunt; enter Cherry Limeade Cupcakes, since this drink is her favorite during the summertime!  I needed some inspiration so I based my recipe off the one I found on Annie's Eats!  The cake portion is moist, tart and limey, which is balanced out by the creamy sweet Whipped Maraschino Cherry Buttercream Frosting!  I brought the extras into work and they were a huge hit!

Limeade Cake 
6 cups of cake flour, sifted
1/2 teaspoon of salt
2 teaspoons baking powder
1 teaspoon baking soda
4 sticks of butter, at room temperature
2 cups of sugar
2 limes (zest one and use the juice of both)
1 can of frozen limeade concentrate, thawed
1 teaspoon of vanilla
6 eggs
1 cup of milk
3/4 cup of lemon-lime soda (I happened to have cherry 7 up on hand so I used that)

Lime Syrup
1/4 cup limeade concentrate, thawed
1/4 cup of sugar

Whipped Maraschino Cherry Buttercream Frosting
3 sticks of butter, at room temperature
9 cups of powdered sugar
1/2 cup of Maraschino cherry juice
1 teaspoon vanilla extract
1/2 cup of heavy whipping cream
Red Food Dye

Garnish
Maraschino cherries
Lime slices, quartered
Straws (Instead of buying special straws, I just cut mine down to size)

1.  Preheat oven to 350 degrees.  In a large bowl add the cake flour, salt, baking powder and baking soda together.  Mix until combined.  

2.  In a separate bowl cream the butter until it is light and fluffy.  Add in the sugar and blend.  Now add the lime zest juice, limeade concentrate and vanilla.  Using a mixer, start to blend the ingredients and then add the eggs, one by one.  

3.  Add half the flour mixture and half of the milk and continue to mix the ingredients.  Add the remaining flour and milk to the batter and mix until everything is incorporated.  Fold in the lemon-lime soda. 

4.  Using an ice cream scoop, spoon the batter into lined cupcake tins.  Bake for 20 minutes or until a toothpick inserted into the center comes out clean.  This recipe will make almost 4 dozen cupcakes, it came out to baking 42 cupcakes for me.  Make sure you bake the cupcakes in two batches, so the cupcakes will bake evenly.

5.  Once the cupcakes have cooled, take a fork and poke 3 times on the top of the cupcakes.  Prepare the lime syrup by whisking the two ingredients together.  Take a spoon and drizzle this on top of all the cupcakes.  This is what gives the cupcake the extra tanginess and fresh limeade flavor!

6.   In another bowl beat the butter until it is light and fluffy.  Add the powdered sugar, juice, vanilla and whipping cream together until it is the desired consistency.  Add the red food coloring and blend until smooth.  Frost on the top of cupcakes.  

7.  Garnish with cherries, lime wedges and straws!  

Tuesday, August 2, 2011

Peach Coffee Cake Muffin Recipe


So, I went to the produce stand again and they had a huge brown paper bag of peaches for only $2!  Beat that Martin's, ha!  However, I now have more peaches than what I know what to do with!  So, I decided to get a little creative These muffins are light and moist unlike some coffee cakes that crumble.  The peaches in the middle provide a wow factor as soon as you take that first bite!  It's a perfect way to start your morning! 

1/2 cup of butter
3/4 cup of granulated sugar
2 eggs 
1 teaspoon of vanilla
2 cups of flour
2 teaspoon of baking powder
1 teaspoon of cinnamon
1 pinch of nutmeg
1/8 teaspoon of salt
1/2 cup of milk
1/4 of brown sugar
3 cups of sliced peaches, skins removed

1.  Preheat your oven to 350 degrees.  Cream the butter with the sugar until it is light and fluffy.  Add your vanilla and then add eggs, one at a time while continuing beating.  

2.  Start to add your dry ingredients to the batter, including the flour, baking powder, cinnamon, nutmeg and salt.  Slowly start to add your milk while beating on low.  

3.  Grease a cupcake tin with butter.  Add a few tablespoons of batter into the tin.  Sprinkle with brown sugar.  Add about three slices of peaches.  Add more batter.  Sprinkle with more brown sugar.  Repeat this process, this will make 12 muffins in total.

4.  Bake for 25 mintues.  Before removing the muffin make sure it is cooled off, if not the top portion may separate from the base.  

Wednesday, July 27, 2011

Strawberry Nutella Bars Recipe


Looking for a decadent dessert that isn't going to take you forever to prepare?  Well, my Strawberry Nutella Bars are the way to go!  I purchased the strawberries from a local produce stand from up the road, so the strawberries were naturally sweet.  They are mess free and easy to eat with your hands which would be perfect for any picnic, party or your next family get together.  I actually made these for a barbeque that my cousin was hosting this weekend.  The bright red strawberries with hazelnut chocolate were a big hit with adults and even the kids couldn't get enough of them while we played corn-hole in the backyard! 

1/2 cup of butter
1/2 cup of sugar
1 teaspoon vanilla
1 tablespoon honey
1 egg
1 cup of flour
1/4 teaspoon of baking powder

Filling
1 cup of strawberries chopped
1 tsp of cornstarch
1 tsp of cinnamon
2 tablespoons of strawberry jam

1/3 cup of Nutella

1.  Preheat the oven to 375 degrees  In a large mixing bowl cream the butter, sugar and vanilla until it is fluffy.  Add in the honey, egg, flour and baking powder.  Beat ingredients until a dough forms.

2.  In a medium size bowl add the strawberries, cornstarch, cinnamon and jam and stir until everything until it is just combined.  Be carefully not to mash the strawberries.  

3.  In a lightly greased 9 inch square baking pan add half the dough mixture and spread until it is smooth.  Add the strawberry filling on top of this.  Using a large spoon drop in the Nutella randomly on top of the strawberry mixture.  

4.  Drop the remaining dough on top of this.  It will not totally cover the strawberry and chocolate mixture.

5.  Bake for about 30-35 minutes or until the top is slightly golden brown.  Cool and then cut into bars.  

Tuesday, July 19, 2011

Perfect Peach Margaritas Recipe


This is a super easy recipe to make and is sure to impress your guests.  It's made with fresh peaches, and you can certainly tell the difference compared to those sugar-loaded mixes.  I made a pitcher of this, poured myself a glass and sat out by the pool this weekend!  

2 tablespoons of sugar (I used Splenda)
2 cups of sliced peaches (skins removed)
3/4 cup of silver tequila
3 cups of ice cubes
2 splashes of citrus flavored soda
Fresh Mint (optional)

1.  Combine the first five ingredients in a blender and blend until all ingredients are well combined.  Top with fresh mint and enjoy!

Wednesday, June 29, 2011

Red, White And Blue Pops Recipe (Strawberry And Blueberry Lemonade Yogurt/Cool Whip Pops)


Perfect and oh so yummy for the 4th of July!  These popsicles combine some of your favorite summertime flavors.  They are creamy, fruity and lemony and nothing but refreshing on a warm summer day.  In my trial run, I used both yogurt (bars to the left ) and cool whip (cup to the right).  I think I like the cool whip ones a little better because once the popsicle starts to melt it tastes like fresh fruit with whipped cream!

1 cup of plain non-fat plain yogurt or fat free cool whip ( I used both in my trial)
1 cup of fresh or frozen strawberries
1 cup of fresh or frozen blueberries
1 cup of 100% lemonade juice concentrate, divided
Popsicle molds or 3 oz paper cups with Popsicle sticks

1.  In a food processor puree the strawberries and 1/2 cup of the lemonade juice concentrate and puree until smooth.  Add this to a separate bowl.  Now add the blueberries to the food processor and the other half of the 1/2 cup of the lemonade juice concentrate and puree until smooth.

2.  Using ice-pop molds layer the strawberry mixture, yogurt or cool whip and blueberry mixture.  Allow popsicles to freeze for about two hours an then insert wooden popsicle sticks.  Freeze for at least 8 hours.

3.  Dip molds into hot water quickly to remove from the mold.   

Wednesday, June 22, 2011

Banana Bread Ice Cream Recipe


Okay, so it's not technically ice cream, but it tastes so good you won't even notice the missing milk and cream!  This is super easy to make, no ice cream maker needed and is a healthy choice when you are craving something sweet.  Plus, you can get your homemade banana bread fix in the summertime, without heating up the house with turning the oven on!  The texture is somewhere between a frozen soft serve custard and a rich sorbet.  I topped mine with candy coated pecans I made a few weeks ago, but chocolate chips would also be a tasty option!

3 overripe bananas peeled
1 teaspoon of vanilla extract
1/2 teaspoon of cinnamon
1 tablespoon of honey 
1 handful of candy coated pecans, chopped
3 tablespoons of mini chocolate chips (optional)

1.  Using a food processor puree all of the above ingredients until the mixture is smooth and fully incorporated.  Add into a bowl and freeze for several hours.  Top with chopped pecans and chocolate chips.  Enjoy!

Wednesday, June 8, 2011

Buckin' Berry Lemonade Recipe


This is a perfectly tart lemonade that is perfect for slow sipping and catching up with one of your best friends.  It's super easy to make and it tastes way better than anything from the can.  Plus, the beautiful berry color is hard to beat! 

1/4 cup of lime juice
3/4 cup of lemon juice
1/2 cup of strawberry lemonade mix
1/2 cup of sugar
2 cups of frozen mixed berries
1.5 quarts of water

1. In a food processor blend the mixed berries together.  

2.  In a pitcher add the juices, strawberry lemonade mix, sugar and the mixed berries.  Add about 1.5 quarts of water and stir ingredients together.  If the drink is too sour, add more water and sugar until your liking.  To remove berry seeds pour the drink through a metal strainer before serving and then enjoy!

Monday, June 6, 2011

Strawberry Stuffed Vanilla Cupcakes with Oreos Recipe (Also Known As Becca Bottoms!)


I made these for my friend's birthday after I learned of  her love for Oreos.  It is a simple vanilla cupcake, with an Oreo bottom, a strawberry stuffed in the middle- all topped off with a fluffy white frosting.  The combination of flavors tastes just like you are eating a strawberry sundae.  If you wanted to skip a step you could use a boxed vanilla cake mix and they would still be just as impresive. 


Vanilla Cupcake Recipe (makes about 24 cupcakes)
2 cups of all purpose flour
1 cup of granulated sugar
3 tsp baking powder
1/2 teaspoon salt
2 teaspoon vanilla extract
1/2 cup of vegetable oil
1/2 cup of milk
4 eggs
1 package of Oreos
Strawberries hulled (smaller the better)

1.  Preheat your oven to 350 degrees.  To a cupcake pan, add liners and place one full Oreo in the bottom to each one.  

2.  In a medium size bowl add the flour, baking powder and salt.  Mix until everything is well incorporated.

3.  In another medium size bowl beat the eggs with the sugar until it is light and starting to foam.  Add in the oil, vanilla extract and milk.  Slowly add dry ingredients and blend until the batter is smooth and fluffy.  Be careful not to over beat the mixture.  

4.   Pour the batter into the cupcake tins- about 3/4 the way full.  Insert into oven and bake for about 20-25 minutes, or until a toothpick insert comes out clean.

5.  While the cupcakes are cooling make the frosting below.

Fluffy White Frosting (this has been adapted by a recipe I have found on yummly.com)
1 1/2 cup of granulated sugar
3 tablespoons of light corn syrup
6 tablespoons of boiling water
3 large egg whites
1 pinch of salt
1 teaspoon of vanilla
1/8 teaspoon of almond extract.

  • Add the sugar, corn syrup and boiling water in a saucepan on medium heat.  (Use a pot that is easy to pour.)  Stir until sugar is completely dissolved (this will happen after it reaches a full boil).  Remove from the heat.

  • In a large bowl beat the egg whites with salt until stiff peaks form.  Slowly pour the hot syrup in a thin stream into the egg whites. Beat until everything is well mixed.
  • Add in the vanilla and almond extract.

  • Continue to beat for about 10-15 minutes or until the icing is stiff.  

6.  Cone out the top of each of the cupcakes.  Place a strawberry inside and then cover with a little bit of cake.  Don't worry if it doesn't completely fit back as it once was, you are going to cover up the top of the cupcake with frosting.  

7.  Spread a heaping amount of frosting on the top of the cupcakes and swirl up to resemble soft serve ice cream.  Top with sprinkles and enjoy!

Related Posts Plugin for WordPress, Blogger...